
No, literally, I mean HOLE-Y.
Even though Halloween is t-minus 3 days away, it’s never too late to “carve” a pumpkin. I had seen this idea floating around online for awhile and decided that this year I was going to test it out. Turns out, making pumpkins covered in holes is the easiest thing, and it looks pretty cool too!

I bought a few big and a few small pumpkins at the grocery store because I didn’t have time to go to the farm this year. To start I opened the top and scooped out all of the pulp and seeds (which I saved to roast…Future blog post coming!)
Once the inside was perfectly scooped out and clean, I started drilling holes in my pumpkins.
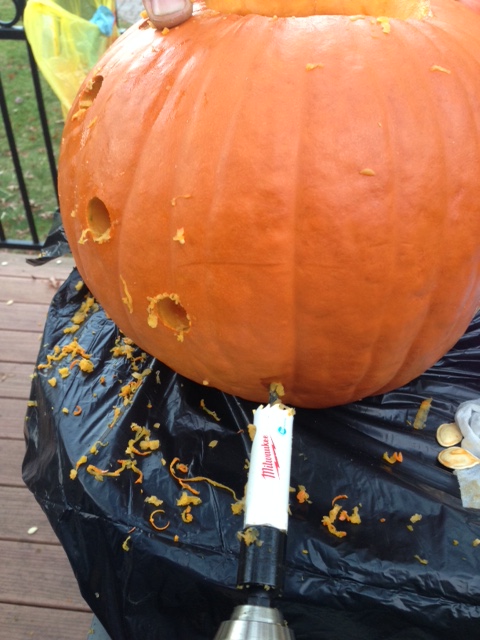
Ok…Maybe I didn’t actually drill the holes myself, maybe I ever so kindly pointed out where I wanted every hole drilled by my handy man <3, and maybe he patiently abided by my requests (for the first one we tried.) Anyway, in the end we used a hole saw drill bit and regular drill bits in all different sizes, with a power drill, to create different patterns in the pumpkins. You don’t have to use a hole saw drill bit if you don’t have one. Any different sized regular drill bits and power drill will do.

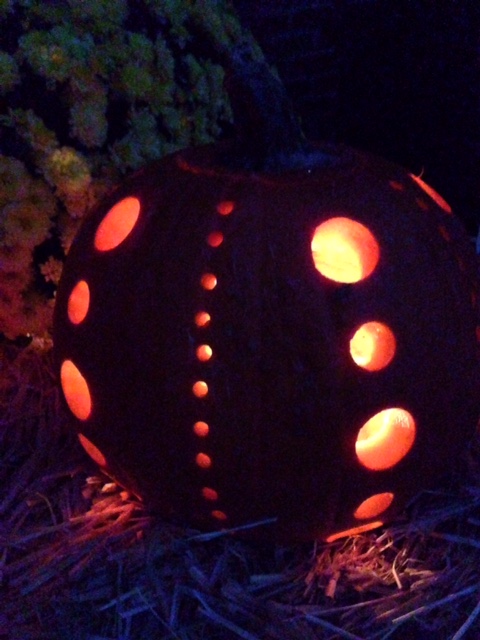
You will have to continue cleaning off the drill with every few holes because the pumpkin gets stuck in it, but it comes off really easily. When we stuck candles in our creations, we were in such awe and really thought they looked awesome! I think that these hole-y pumpkins would also be great in a table scape or fall centerpiece for Thanksgiving or any fall gathering.


Happy carving!
xoxo
Corporate Crafty Chic
p.s. at the same time, I used one of those pumpkin carving kits with a design to make this cool cat

